JELDATA3 Operation Manual
8. Setup
- 8.4 Transceive
-
It is for transceiving “A Data”, “I Data", "D Data” and Parameter (if it is supported).
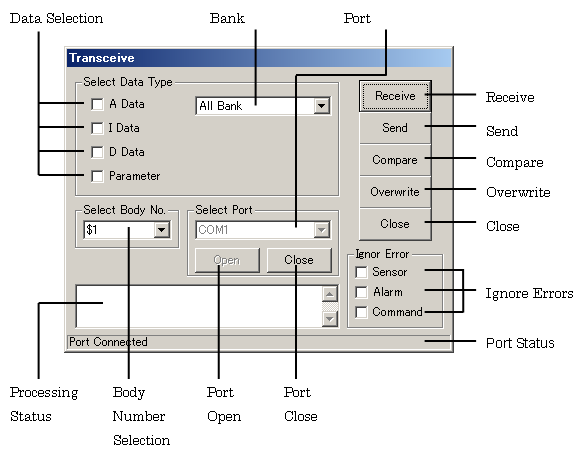
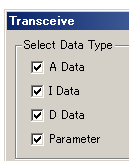
(1) Transceive data selectionTick the box and select the data to transceive.
The [Parameter] will not appear if the parameter function is not available for this robot.
(2) Bank selection
Select the bank number from the bank list. The bank number will not appear if the bank function is not available for this robot.
Selects “All Bank” → Sends/Receives all bank.
Selects other than “All Bank” → Sends/Receives the designated bank only.

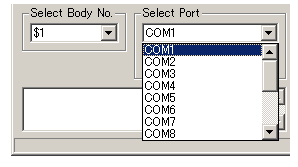
(3) Body Number SelectionSelect the body number to communicate from the list.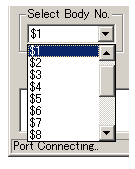
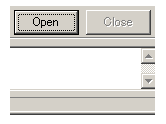
(4) Port OpenClick the [Open] button to open the communication port.
When the application is started, the communication port that was used in the previous communication automatically opens.
While opening the port, this button is invalid.
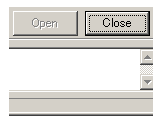
(5) Port Close
Click the [Close] button to close the communication port.
The port is automatically closed when the application is exited.
While closing the port, this button is invalid.
(6) Port SelectionSelect the communication port from the list.
To change the port while the port is connected, close the port with the [Close] button. Then select the other port and click the [Open] button to open the new port.
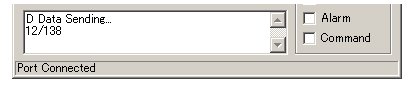
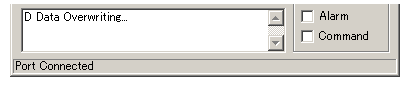
(7) Port Status
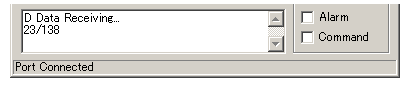
It shows the communication status of the port.
The message appears when the port is connected, and no message appears when it is not connected.

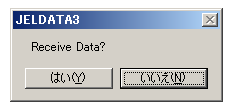
(8) Receive
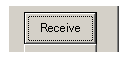
The confirmation message appears when the [Receive] button is clicked. If it is OK, click the [Yes] button to receive the selected data from the controller.
Click the [No] to cancel the operation.
While receiving the data, the progress is shown on the status bar.
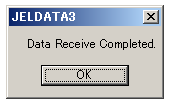
When data receive is completed, the completion message appears.
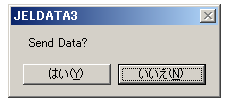
(9) Send
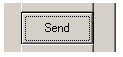
The confirmation message appears when the [Send] button is clicked. If it is OK, click the [Yes] button to send the selected data to the controller. Click [No] to cancel the operation.
While sending the data, the progress is shown on the status bar.
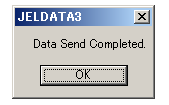
When data sending is completed, the completion message appears.
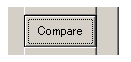
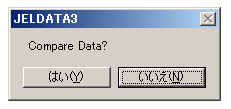
(10) Compare
The confirmation message appears when the [Compare] button is clicked. If it is OK, click the [Yes] button to compare the selected data with the data in the controller.
The result will be displayed at the comment of each data dialog box.
Click [No] to cancel the operation.
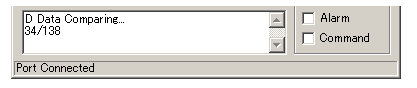
While comparing the data, the progress is shown on the status bar.
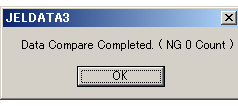
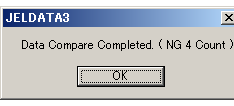
When data comparison is completed, the dialog box shows the completion message and the numbers of NG.
・Example) When all the data matched (NG is 0):
・Example) When there are data mismatched (NG is 4):
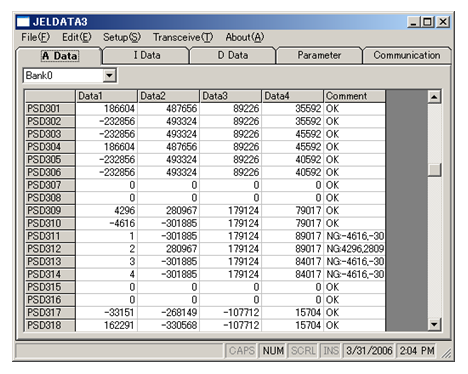
・Result of “A Data” comparison
・Result of “I Data” comparison
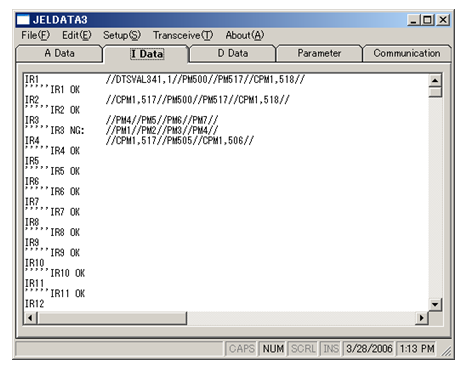
Data match → OK
Data mismatch → NG: Contents of the controller data
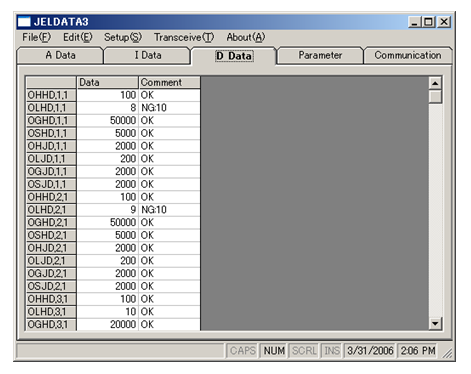
・Result of “D Data” comparison
・Result of Parameter comparison
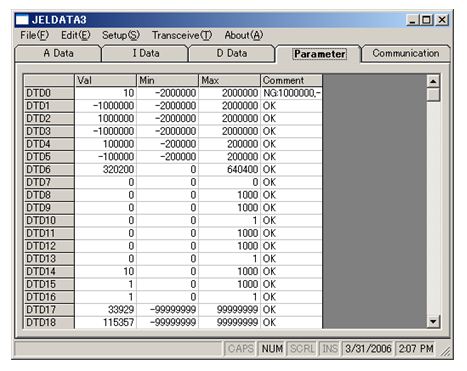
Data match → OK
Data mismatch → NG: Contents of the controller data
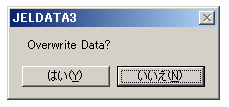
(11) Overwrite

The confirmation message appears when the [Overwrite] button is clicked. If it is OK, click the [Yes] button to store the selected data in the controller. Click [No] to cancel the operation.
While writing the data, the progress is shown on the status bar.
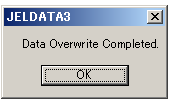
When data overwrite is completed, the completion message will appear.
(12) Ignore Error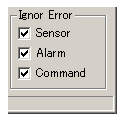
Tick the box to select error(s) to ignore.
This function is not necessary for the standard operation.
Use this when data sending/receiving is necessary while the robot is in alarm stop.
Sensor error, Alarm error and command error are errors from the controller and they can be ignored.
! Caution Use this function when Sensor error, Alarm error or Command error occurs in the controller.
(If the error occurs in the controller, the error message will appear while data sending/receiving.)
(13) Close
Click the [Close] button and close the “Transceive” dialog box.
[an error occurred while processing this directive]