JELDATA3 Operation Manual
8. Setup
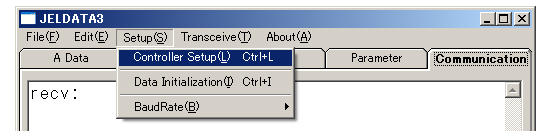
- 8.1 Controller setup
-
 (Figure: 8-1)
Controller setup window appears. (Figure: 8-1)
The controller setup of the designated robot (series) is automatically executed.
This window appears also at the first start-up operation.
・Setup window for the standard robot.
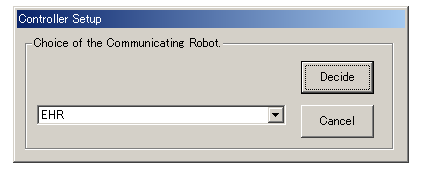
Select the robot series from the list and click the [Decide] button.

* Click here to refer to “List of the robot series” for the choice of the robot series.
・Setup window when the customized specification robots are included in the communicating robot.
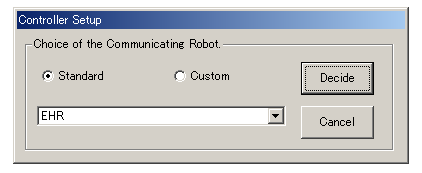
If the robot that executes communication is a standard type, select [Standard]. If the robot that executes communication is a customized specification robot, select [Custom].
・When [Standard] is selected:
Select the robot series from the list and click the [Decide] button.
・When [Custom] is selected:
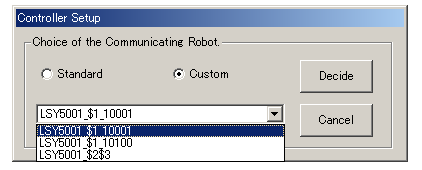
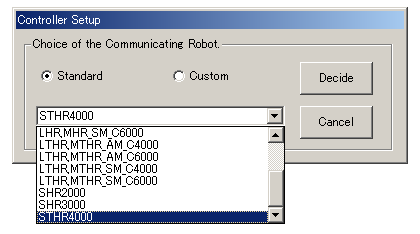
Select the robot series from the list and click the [Decide] button.
(The figure above is an example of the list.)
・[Decide] button
Press the button to execute the controller setting.
While executing, the progress is shown on the status bar.(Figure: 8-2)
* When [Controller setting] is completed, [Data format] is automatically executed.
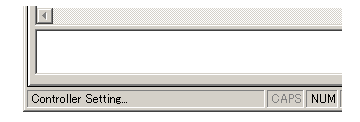 (Figure: 8-2)
・[Cancel] button
Return to the main window.
Cancel cannot be executed at the first start-up. (There is no [Cancel] button indicated.)
[an error occurred while processing this directive]